HQ MOUNT On-Site in Norway | Pioneering Vertical Solar Solutions Where Geography Drives Innovation

We’re excited to share an exclusive update from our recent field visit to a cutting-edge vertical solar installation site in Norway! As a global provider of advanced solar mounting systems, HQMOUNT is proud to explore how Norway’s Arctic environment makes vertical solar a uniquely powerful solution.


Why Norway? The Vertical Advantage at High Latitudes

Norway’s geographic conditions — stretching up to 71°N latitude — present challenges that vertical solar technology turns into opportunities:


Low Sun Angle Optimization

Vertical-mounted panels are ideal for capturing the sun’s shallow trajectory in winter, ensuring optimal energy production even in low-light months.


Snow & Ice Resilience

Wall-mounted systems avoid snow burial and harness reflected light from snow-covered terrain.


24-Hour Summer Sun

Vertical panels mounting efficiently absorb extended horizontal light during Norway’s long dawns, dusks, and 24-hour sunlight periods.


Collaborating for Cold Climate Innovation

HQMOUNT is working closely with local Norwegian partners to deliver next-generation vertical solar systems designed specifically for extreme climates. These installations aim to transform walls into energy-generating assets, enabling sustainable power even in the world’s northernmost regions.


Together, we’re turning walls into energy assets!


CONTACT US---XIAMEN HQ MOUNT TECH CO.,LTD

Whatsapp : 18030160771

Tel : 86 05926252889

Email : allie@hqmount.com


#VerticalSolar #HQMOUNT #ArcticEnergy #CleanEnergyFuture #SolarMounting #NordicInnovation #NorwaySolar #CleanEnergyFuture #NordicSolar#RenewableTech

Solar Mounting Production in Full Swing at HQ Mount!

We’re proud to share a behind-the-scenes look at how HQ Mount powers solar energy projects worldwide with precision-engineered mounting solutions.  Check out our new HQ Mount 2025 video to see how SGS delivers precision-engineered solar mounting solutions:


Inside our production facility:
Round-the-clock production for solar power plants
Automated manufacturing of rooftop mounting accessories
Efficient loading for on-time delivery

From rooftop solar to large-scale PV farms, we deliver customized, reliable, and scalable mounting systems to meet your project needs.


Looking for a trusted solar mounting partner?
We combine engineering precision, production capacity, and responsive service to support global solar installers, distributors, and EPC contractors.

→ Explore SGS solutions: www.hqmount.com

#SolarEnergy #RenewableTech #SolarMounting #ManufacturingExcellence #HQMount #SolarSolutions #CleanEnergy #SolarMounting

Aluminum vs. Steel Which is Better for Ground Solar Mounting?

As solar energy continues to expand across the globe, selecting the right materials for ground-mounted solar systems becomes a crucial decision for developers, EPCs, and asset owners. Two of the most common materials used in solar mounting structures are aluminum and steel—each offering unique benefits and trade-offs. But which one is better for your ground solar project? Let’s explore the key differences to help you make an informed decision.


solar mounting


1. Strength and Structural Integrity

Steel is significantly stronger than aluminum. It has a higher tensile strength and load-bearing capacity, making it an ideal choice for utility-scale solar farms or sites with harsh environmental conditions, such as heavy snow or strong winds. Galvanized steel (typically hot-dip galvanized) also resists corrosion over time when properly treated.

Aluminum, while not as strong as steel, is still suitable for many ground-mount applications, especially in small to medium-scale projects. It’s generally used in extruded profiles with optimized shapes that provide the necessary strength with less material.

 Choose steel when structural strength under load is a top priority.

2. Corrosion Resistance

Aluminum naturally forms a protective oxide layer, giving it excellent corrosion resistance—especially in coastal or highly humid environments. This makes it a go-to choice for areas prone to rust issues.

Steel, unless it is galvanized or coated, is more susceptible to corrosion. Hot-dip galvanization can significantly extend the lifespan of steel structures, but over time, corrosion might still occur, especially if coatings are damaged.

Choose aluminum for long-term corrosion resistance, particularly in coastal regions.


solar mount


3. Weight and Handling

Aluminum is about one-third the weight of steel, making it easier and faster to transport, handle, and install. This can reduce labor costs and construction time on-site.

Steel, being heavier, typically requires heavier machinery and more manpower for installation. However, its rigidity often means fewer supports are needed.

for Choose aluminum for ease of installation and lightweight transport.

4. Cost

Steel is generally more cost-effective than aluminum on a per-kilogram basis. Even with galvanization, steel structures often offer a better price-performance ratio, especially for large-scale installations.

Aluminum is more expensive, but the added cost may be offset by reduced labor, faster installation, and lower maintenance over time.

Choose steel for budget-sensitive projects with robust construction teams.

5. Environmental Impact and Sustainability

Both materials are recyclable, but aluminum has a higher embodied energy (energy used in production). However, because it is lightweight and requires less maintenance, aluminum may have a lower overall lifecycle impact in some cases.

Steel is also widely recycled and has a mature global recycling infrastructure. Some developers may choose materials based on the availability of low-carbon steel or recycled aluminum.

Consider local availability and enviromental priorities when evaluating sustainability.


solar farm solution 


Final Verdict: Which Is Better?

There’s no one-size-fits-all answer. The best choice between aluminum and steel for ground solar mounting depends on your project size, environmental conditions, budget, and logistics.


Criteria

Best Material

Structural Strength

Steel

Corrosion Resistance

Aluminum

Lightweight Installation

Aluminum

Cost-Effectiveness

Steel

Coastal Applications

Aluminum

Large Utility Projects

Steel


When in doubt, consult with your solar mounting system supplier or structural engineer. A hybrid approach—using steel for foundations and aluminum for above-ground structures—is also gaining popularity as it combines the strengths of both materials.

How Does Hot-Dip Galvanizing Improve Ground Mount System Durability?

As the solar industry continues its rapid expansion, durability and long-term reliability have become critical factors in solar mounting system design. Among the most trusted methods for protecting steel structures in outdoor installations is Hot-Dip Galvanizing (HDG). This treatment greatly enhances the durability of solar mounting systems, especially in ground-mounted applications such as C channel solar structures and single pile solar mounting systems. In this article, we explore how HDG steel adds lasting value to modern solar panel mounting solutions.


solar panel mounting solutions 


What Is Hot-Dip Galvanizing?

Hot-Dip Galvanizing is a process where fabricated steel parts are dipped into molten zinc. This forms a tough, tightly bonded zinc coating that shields the steel from corrosion. The result is a uniform, durable protective layer that extends the life of solar mounting systems, even under harsh environmental conditions.


Benefits of HDG for Ground Mount Solar Structures

1. Exceptional Corrosion Protection

Ground-mounted solar systems are often exposed to moisture, UV rays, soil chemicals, and varying temperatures. HDG-treated steel offers superior corrosion resistance, making it ideal for long-term outdoor installations. For example, C channel solar structures benefit from full-surface protection, including weld joints and internal edges.

2. Longevity and Low Maintenance

HDG extends the lifespan of steel components to 25–30 years or more with minimal maintenance. This is particularly valuable for single pile solar mounting systems, which are often used in utility-scale solar farms where maintenance access is limited and costly.

3. Strength and Structural Integrity

HDG enhances not just the lifespan but also the mechanical strength of components by preventing rust-related degradation. C channel solar structures—commonly used in fixed-tilt or adjustable angle arrays—must withstand heavy wind and snow loads. Hot-dip galvanizing ensures their continued performance throughout the project lifecycle.

4. Economic Efficiency Over Time

While HDG may have a slightly higher upfront cost than untreated or painted steel, its long-term durability eliminates the need for frequent repainting, repair, or replacement. This significantly lowers the total cost of ownership for large-scale solar installations.


single pile solar mounting supplier 


Real-World Applications in Solar Mounting Solutions

Whether used in agricultural fields, desert zones, or coastal areas, HDG is a key component of reliable solar infrastructure. The following systems gain the most from this treatment:

C Channel Solar Structure (also known as C-Steel Ground Mounting System): These steel structures form the core frame of many ground-mount PV systems. Their C-shaped profile offers high strength and easy installation. HDG coating preserves their structural properties and prevents rust, ensuring project longevity.

Single Pile Solar Mounting System: Often deployed in utility-scale projects, this design relies on vertical posts driven into the ground. HDG treatment protects these load-bearing elements from soil corrosion and weathering over time.


C channel solar structures


Conclusion

Hot-Dip Galvanizing is a critical factor in the long-term performance and reliability of ground-mounted solar systems. Whether you’re deploying a single pile solar mounting system or a C channel solar structure, HDG steel solar mounts offer a resilient, cost-effective solution for modern solar panel mounting solutions.

By investing in galvanized steel, solar developers and EPCs not only safeguard their infrastructure but also align with sustainable and low-maintenance engineering practices.

How Durable Are Wire Mesh Cable Trays in Harsh Solar Environments?

In solar PV installations—especially on rooftops and in utility-scale fields—managing electrical cables effectively is as important as panel alignment or inverter placement. One common solution for cable support is the wire mesh cable tray, known for its open design and flexibility. But how do these trays hold up in harsh solar environments over time?

Let’s explore the durability of wire mesh cable trays and what installers, EPCs, and O&M professionals should consider when selecting and maintaining them.


wire mesh cable tray supplier 


What Makes Solar Environments Harsh?

Solar installations are subject to some of the most demanding environmental conditions:

Intense UV exposure

High temperature fluctuations (thermal expansion and contraction)

Rain, humidity, and water pooling

Salt-laden air in coastal regions

Dust and debris accumulation

Animal interference (birds, rodents, insects)

These elements can degrade poorly chosen materials and reduce the lifespan of cable trays and the critical cables they support.


Material Matters: Stainless Steel vs. Galvanized Steel

The durability of a wire mesh cable tray largely depends on the material it’s made from:

1. Electro-Galvanized (EG) Steel

Pros: Low cost, lightweight

Cons: Not suitable for outdoor or high-humidity environments

Use Case: Indoor or short-term use only

2. Hot-Dip Galvanized (HDG) Steel

Pros: Improved corrosion resistance compared to EG

Cons: Susceptible to rust in coastal or acidic environments

Use Case: Acceptable for inland rooftop systems if no salt exposure

3. Stainless Steel (SS304 or SS316)

Pros: Excellent corrosion resistance, long service life, ideal for coastal, industrial, and high-humidity environments

Cons: Higher upfront cost

Use Case: Best for harsh outdoor solar environments


Wire mesh trays for solar 


Drainage and Airflow: Key Design Advantages

Wire mesh trays naturally allow:

Excellent drainage (prevents water pooling and corrosion)

Air circulation (reduces cable overheating)

Visual inspection and ease of maintenance

These features are particularly valuable on solar rooftops, where space is limited and trapped moisture can quickly cause damage.


Installation and Maintenance Best Practices

To maximize durability, consider the following:

Proper fastening: Secure trays with corrosion-resistant brackets and supports

Cable separation: Avoid overfilling trays; maintain proper spacing to prevent overheating

UV-resistant cable ties: Use stainless steel or UV-rated nylon for long-term cable securing

Protective covers: Install top covers where bird droppings, falling debris, or direct sun exposure are concerns

Regular inspection: Look for signs of rust, loosening, or animal intrusion


stainless steel wire mesh tray 


Wildlife and Environmental Protection

Wire mesh trays are often more exposed than enclosed trunking systems, so:

Consider adding bird guards or mesh covers to prevent nesting

Use conduit or protective sheathing on vulnerable cables in rodent-prone areas


Lifespan and ROI Consideration

While stainless steel wire mesh trays may cost more upfront, their resistance to corrosion, minimal maintenance requirements, and long operational lifespan often outweigh the initial investment—especially in long-term solar projects designed for 20–25 years.


Conclusion

Wire mesh cable trays can be highly durable in harsh solar environments if the right material is chosen and installation best practices are followed. For critical solar infrastructure, especially in corrosive or humid locations, stainless steel wire mesh trays are often the most reliable option, offering both physical robustness and long-term cost efficiency.


Is an HDG Steel Mounting System Worth the Investment in Coastal Regions?

When it comes to installing solar systems in coastal areas, one of the most important factors to consider is durability. The harsh marine environment — with its high humidity, salt-laden air, and frequent storms — can cause rapid corrosion and structural degradation if materials are not properly selected. This raises an important question for EPC contractors, developers, and property owners: Is a Hot-Dip Galvanized (HDG) steel solar mounting system truly worth the investment in coastal regions?


solar mounting


What Is HDG Steel?

Hot-Dip Galvanized steel refers to steel that has been dipped into molten zinc to form a robust, corrosion-resistant coating. This zinc layer acts as both a physical barrier and a sacrificial anode, protecting the underlying steel from oxidation and corrosion.


Coastal Challenges for PV Mounting Systems

Coastal environments are among the most aggressive settings for solar installations. Here’s why:

Salt Spray: Salt in the air accelerates corrosion of exposed metal.

High Humidity: Increases the risk of rust and galvanic corrosion.

Wind Loads: Structures must withstand strong coastal winds and potential typhoons.

Maintenance Difficulty: Coastal corrosion may demand more frequent repairs and replacement if cheaper materials are used.

Without a proper corrosion-resistant system, solar projects near the coast may face costly structural failures and reduced system lifespan.


HDG solar bracket


Benefits of HDG Steel in Coastal Areas

Superior Corrosion Resistance
HDG steel can last 20–50 years in most environments, and 15–25 years in highly corrosive coastal zones. This significantly outperforms standard pre-galvanized or painted steel components.

Low Maintenance Costs
HDG steel requires little to no maintenance compared to alternative coatings. This is especially important in remote or hard-to-reach installations.

Structural Strength
HDG steel maintains the mechanical strength of the base metal while providing long-term protection, making it ideal for heavy wind and weather conditions often found near the sea.

Whole-System Protection
The galvanization process coats the entire surface of the steel, including edges, corners, and hard-to-reach internal surfaces — areas that are often vulnerable in painted or plated systems.

Sustainable Investment
Although HDG systems can be more expensive upfront, they reduce lifecycle costs by minimizing replacement and repair needs. The investment is especially justified in harsh environments where cheaper materials may fail prematurely.


Considerations and Best Practices

Zinc Thickness Matters: Ensure the HDG system complies with standards such as ASTM A123 or ISO 1461. Thicker zinc coatings offer better longevity.

Avoid Galvanic Corrosion: Use compatible materials (e.g., stainless steel fasteners with isolators) to prevent reactions between dissimilar metals.

Regular Inspection: Even though HDG is highly durable, regular inspections can help identify early signs of wear in extreme coastal environments.


solar bracket


Conclusion

In coastal regions where corrosion is a constant threat, an HDG steel solar mounting system is not just a smart choice — it's a critical investment for long-term system performance and reliability. While the upfront cost may be higher compared to untreated or lightly coated systems, the durability, lower maintenance needs, and extended service life make it a cost-effective solution over time.

For solar projects built to last in challenging environments, HDG steel proves its worth.

Is DIY Solar Panel Mesh Installation Difficult?

If birds have started nesting under your rooftop solar panels—or you're trying to prevent that from happening—you’ve probably heard of solar solar panel bird mesh as an effective and long-lasting solution. But many homeowners and small installers wonder:

Can I install it myself?
Do I need special tools?
Is it safe or difficult?

The good news is: DIY installation is very doable, even for first-timers, and it requires only basic tools. Here’s a breakdown of what to expect and how to prepare.


solar panel bird mesh supplier 


How Difficult Is DIY Bird Mesh Installation?

On a difficulty scale from 1 to 10, bird mesh installation usually falls around a 3 or 4 for most people with basic handyman skills.

You don’t need to drill into your solar panels or roof.
The mesh clips or fasteners are designed to be non-invasive and easy to attach.
Most installations can be completed in 2–4 hours depending on the size of your solar array.

However, working at heights is the main challenge. If you’re not comfortable using a ladder or working on your roof safely, you may want to hire a professional.


bird mesh for solar panels


What Tools Are Needed?

Here’s what you’ll typically need for a standard DIY bird mesh installation:

Basic Tools:

Ladder or roof access (with safety harness if required)

Work gloves – to protect your hands from sharp wire edges

Wire cutters or aviation snips – for cutting the mesh to fit

Tape measure – to measure and cut accurate lengths of mesh

Zip ties or pliers – for fastening or adjusting clips

Protective eyewear – especially if cutting metal mesh


Optional but Helpful:

Cordless drill – only if you're using screw-in clips or grounding lugs

Rooftop anchor kit – for safety if working on steep or slippery roofs

Caulking gun – if you want to seal the mesh edges for extra protection (optional)


solar panel bird mesh kit 


Step-by-Step Overview

Measure the perimeter around your solar array.

Cut the bird mesh into manageable strips (e.g. 2–3 meters).

Attach the mesh using bird mesh clips, securing it to the panel frame—not the roof or the glass.

Overlap mesh sections slightly to ensure there are no gaps.

Inspect the installation for weak spots and adjust if needed.

Tip: Avoid overtightening clips which might bend the mesh or frame.


When Should You Call a Professional?

While DIY is realistic for many, you should consider hiring a pro if:

Your panels are on a steep or high roof

You don’t have the right safety equipment

You’re uncomfortable with tools or heights

You have a large system with dozens of panels

Safety always comes first. In some cases, paying for a professional installation can save you time—and possible injuries.


Final Thoughts

Installing bird mesh yourself isn’t as intimidating as it sounds. With the right tools and some basic precautions, you can protect your solar investment from bird damage and reduce long-term maintenance costs.

Whether you’re a DIY homeowner or a solar installer looking to offer bird-proofing as a value-add service, a well-installed bird mesh is a smart upgrade.

The Overlooked Essentials of Rooftop Solar Systems Beyond Panels and Mounting Structures

When we talk about rooftop solar systems, most people immediately think of solar panels and the supporting mounting structures. However, a truly reliable and efficient solar PV system involves much more. From bird deterrents and electrical systems to structural integrity and compliance with local regulations, every detail counts.

In this post, we’ll explore the often-overlooked but critical components and considerations that go into building a safe, durable, and long-lasting rooftop solar installation.


 solar roof bracket


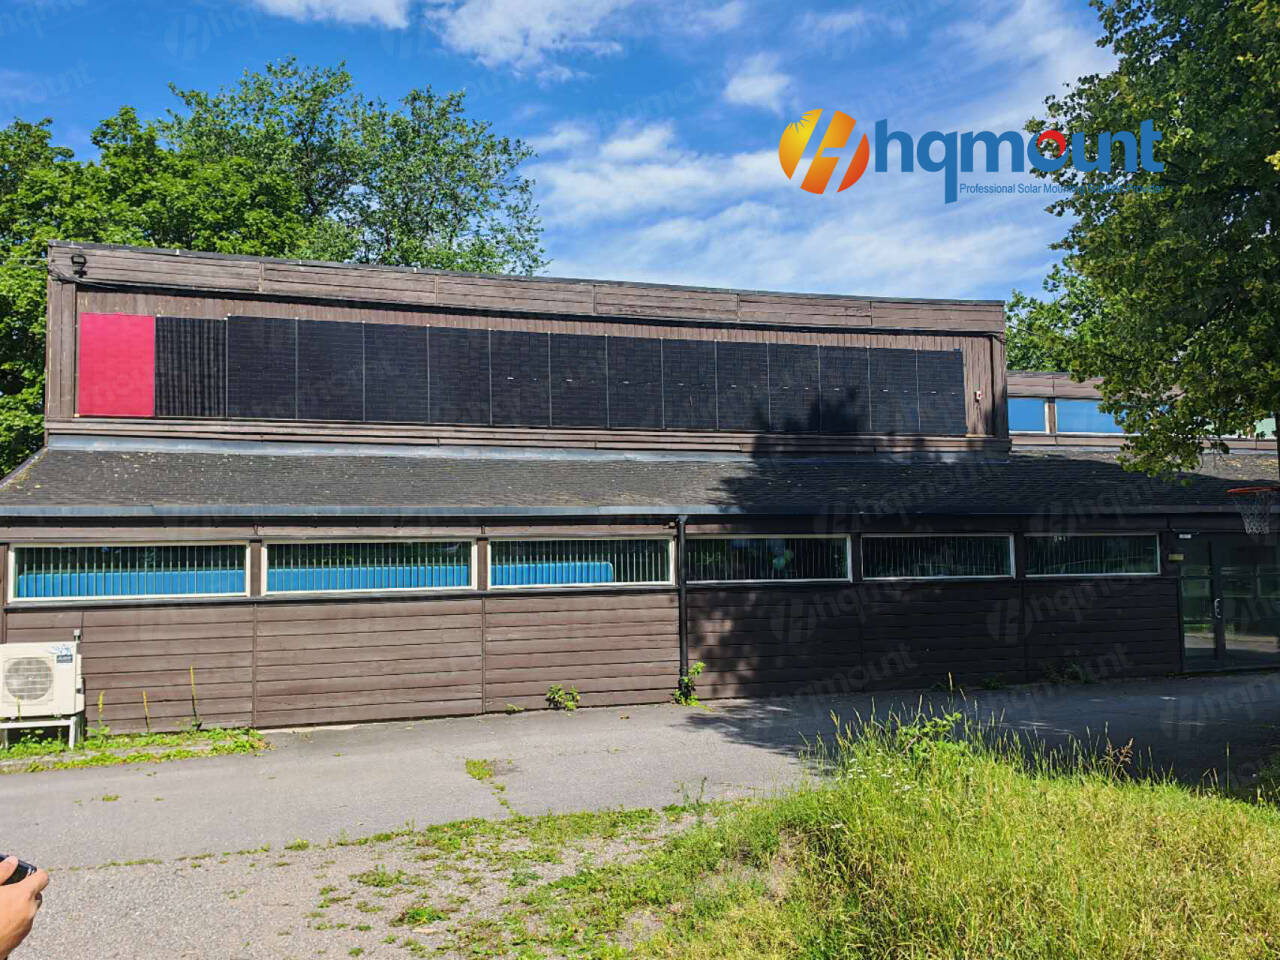
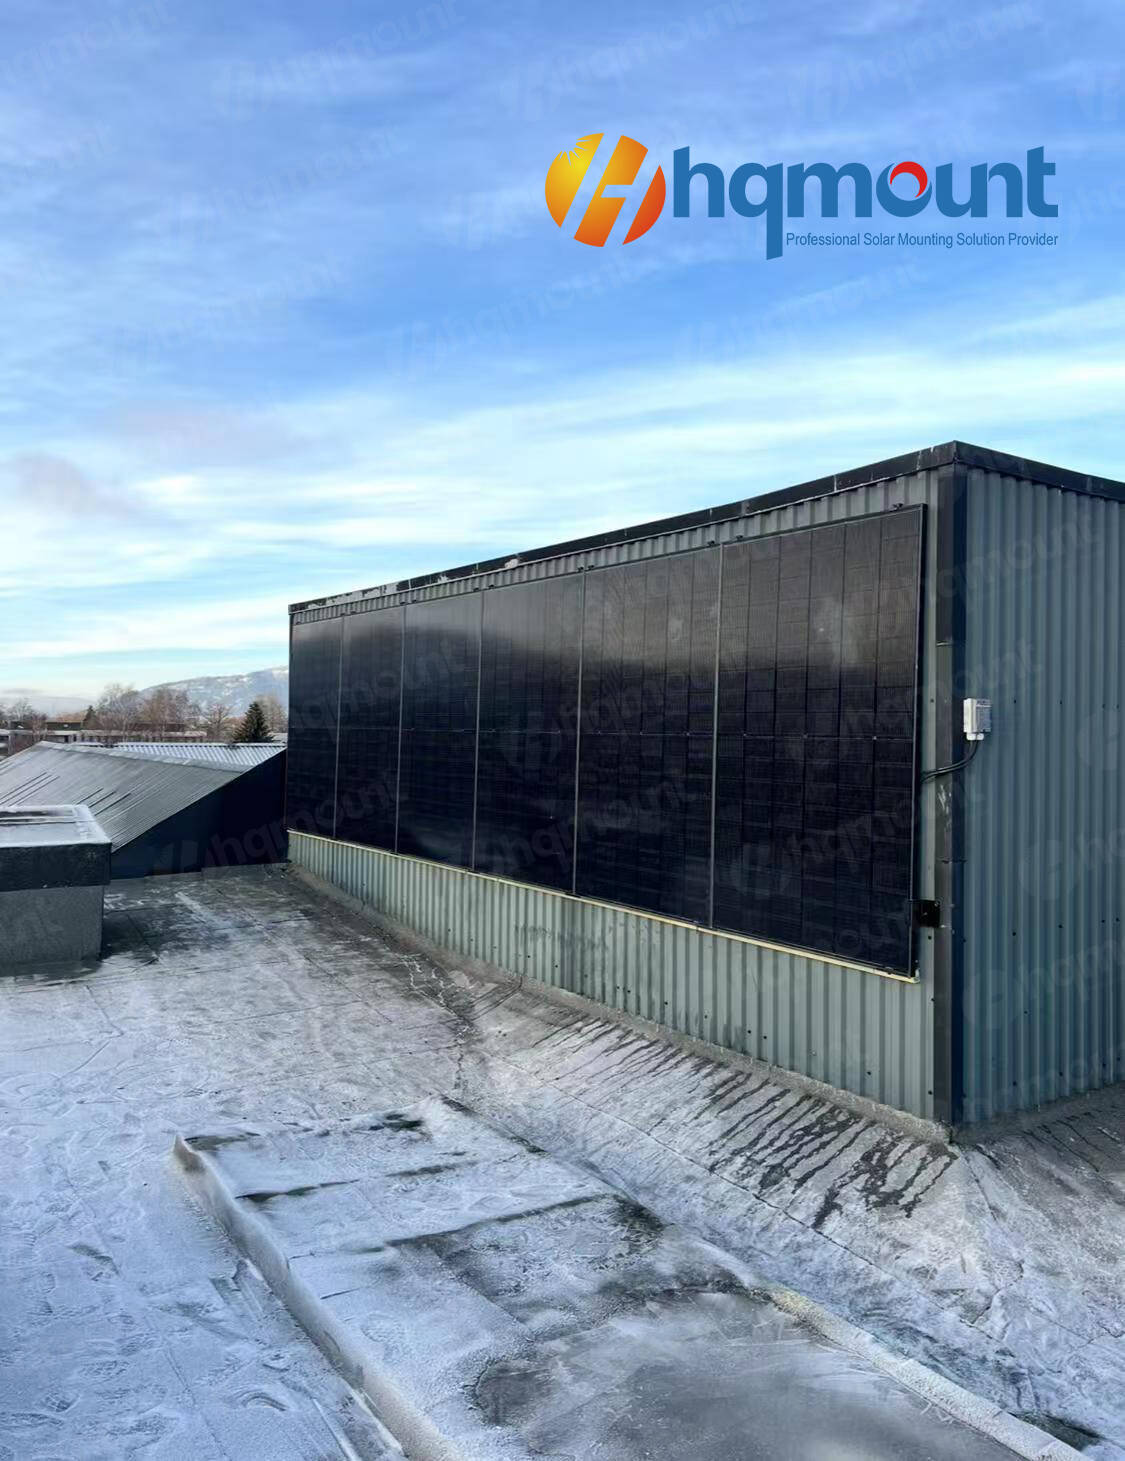
1. Solar Panels and Mounting Structures: The Foundation

Solar panels and their mounting systems form the core of any rooftop PV system. The panels capture sunlight, and the mounting structures secure them to the roof. But their effectiveness depends heavily on several finer points:

Correct tilt angle and orientation for maximum output

Appropriate mounting for roof type (metal, tile, flat concrete, etc.)

Wind load and uplift resistance

Corrosion resistance and weatherproofing (e.g., hot-dip galvanized steel)


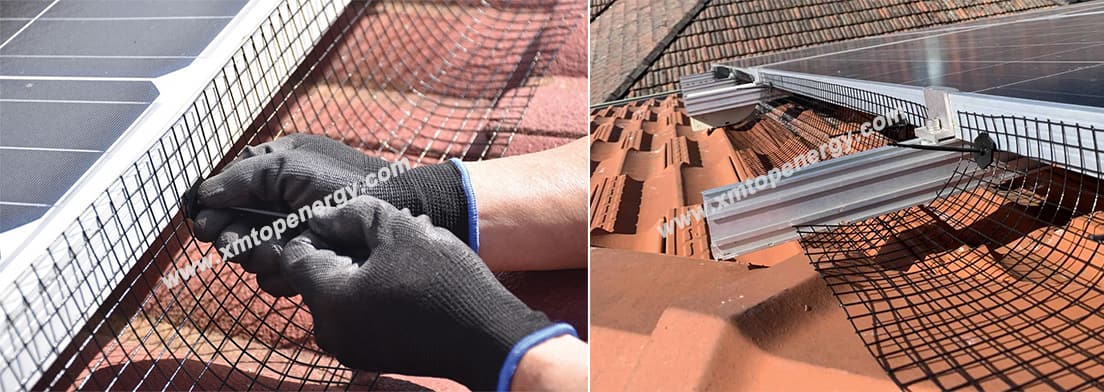
2. Bird Netting: A Small Detail with Big Impact

Birds nesting under solar panels can cause significant issues:

Droppings that reduce panel efficiency

Nesting materials that present fire risks

Damage to cables and panel backsheets

Installing UV-resistant bird mesh or netting can effectively prevent these problems. However, care must be taken to ensure the netting:

Doesn’t restrict airflow under panels

Doesn’t apply stress to the solar mounting structures

Is made from durable, weather-resistant materials


solar panel mesh supplier 


3. Electrical Systems: The Nerve Center of Your Solar Setup

The performance and safety of your system hinge on a well-designed electrical setup. Key considerations include:

Proper cable management: Secure routing using stainless steel cable ties or UV-resistant plastic ties

Cable trays: Preferably made of FRP or stainless steel, with protective covers

Grounding and lightning protection: Essential for safety and regulatory compliance

Waterproofing of junctions: Use of sealed glands and conduits for roof penetrations


4. Structural & Protective Measures: Safety First

Solar systems add weight and wind load to the roof. It’s critical to assess:

Roof load capacity: Can it bear the added weight of panels, racking, and wind uplift?

Thermal expansion: Long rails need expansion joints to prevent buckling

Corrosion control: All cut edges should be treated to maintain anti-corrosion performance

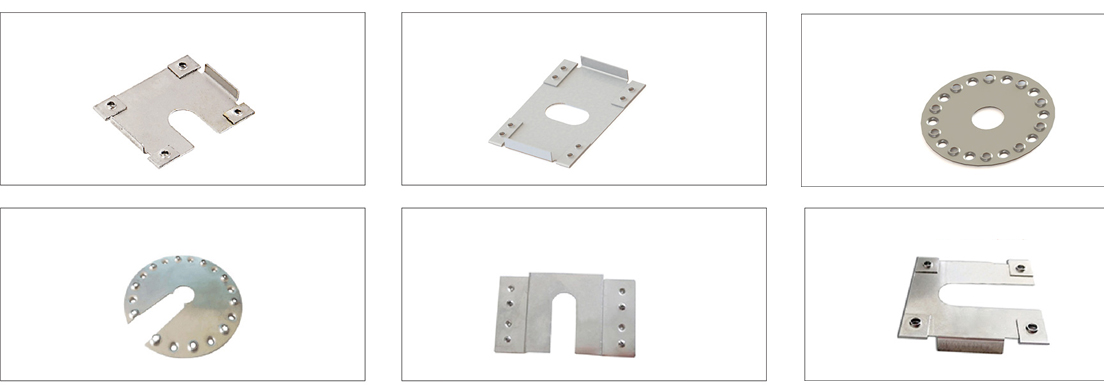
Fixings and fasteners: Must be compatible with roof material to prevent leaks


solar mount manufacturer 


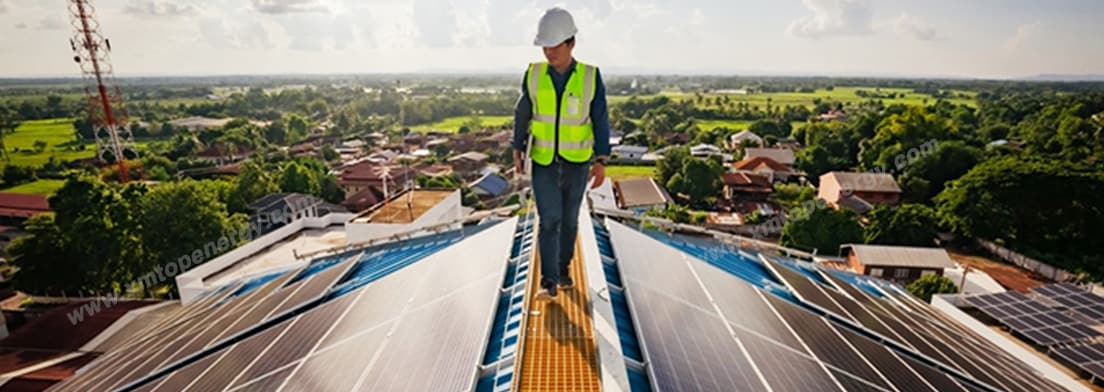
5. Installation & Long-Term Maintenance

A good installation isn’t just about putting panels on a roof; it’s about long-term serviceability:

Access paths: FRP walkways or maintenance aisles are essential for safe inspection and cleaning

Drainage planning: Ensure water does not accumulate around panels

Animal-proofing: In addition to birds, protect the system from rodents and insects

Replaceability: Ensure that individual components (e.g., a single panel or cable) can be replaced without dismantling the entire system


6. Environmental & Regulatory Compliance

Local regulations and environmental factors must be factored into the design:

Fire safety standards: Cable insulation and components must meet fire resistance requirements

Building aesthetics and approvals: Especially in residential or historic districts

System insurance: Protection against natural disasters, theft, or damage

Product warranties: Ensure panels and structural components come with 10+ year warranties


Conclusion

A rooftop solar PV system is more than just panels and brackets. Attention to detail in electrical layout, structural safety, pest prevention, and regulatory compliance can make the difference between a system that merely functions and one that excels for 25 years or more.

Whether you're a project developer, installer, or end-user, understanding these often-overlooked elements will help ensure your solar investment is safe, efficient, and future-proof.

What is an Earth Clip for Solar?

An earth clip, also known as a grounding clip or earthing clip, is a small but essential component used in solar photovoltaic (PV) mounting systems. Its main function is to ensure electrical continuity and grounding between PV modules and the solar mounting structure, thereby preventing electric shock risks and protecting equipment from lightning or fault currents.


solar mounting supplier


Why Grounding is Important in Solar Systems

Grounding is critical for:

Safety: It prevents electrical shock hazards by safely conducting fault currents to the ground.

Lightning protection: It provides a path for surge currents during lightning strikes.

System integrity: It reduces electromagnetic interference (EMI) and ensures consistent voltage potential across the PV array.

Code compliance: Most national and international electrical standards (e.g., NEC, IEC) require proper grounding for solar systems.


Features of Solar Earth Clips

Material:
Usually made of stainless steel (SS304 or SS316) for corrosion resistance and long-term durability in outdoor environments.

Design:

Sharp or pointed tabs pierce the anodized layer of aluminum frames or rails, creating a metal-to-metal contact.

Designed to fit between the PV module frame and the solar mounting rail or between two modules and the mid clamp.

Can be pre-installed on mid clamps or grounding lugs.

Compatibility:
Earth clips are available in different sizes and designs to match specific rail profiles, solar clamps, and PV frame thicknesses.

Installation:

Tool-free or minimal tool required.

Often clipped directly to the rail or installed during the clamp tightening process.


grounding clip supplier 


Typical Applications

Between solar module frame and mounting rail (when using mid clamps).

Between two modules (to connect frames together).

As part of a grounding path that connects to a grounding lug or conductor cable, then to earth.


Standards and Certifications

High-quality earth clips should meet relevant electrical standards, such as:

UL 467 (for grounding and bonding equipment)

IEC 61730 (safety standards for PV modules)

TÜV certification


Advantages of Using Solar Earth Clips

Fast and easy installation
No need for additional drilling or wires
Cost-effective and durable
Compatible with most rail-based mounting systems
Ensures compliance with international safety standards


solar Earth clips 

Conclusion

Earth clips may be small, but they play a big role in the safety, reliability, and code compliance of your solar PV system. Choosing a high-quality, corrosion-resistant clip ensures long-term performance and peace of mind.

If you're sourcing solar mounting accessories, be sure to include certified grounding clips as part of your system package.

What Is Bird Mesh for Solar Panels?

Bird mesh for solar panels is a physical barrier installed around the perimeter of rooftop solar arrays to prevent birds and small animals from nesting underneath the panels. It helps maintain the cleanliness, safety, and performance of the solar system—especially in residential and commercial rooftop installations.


Why Use Bird Mesh?

Prevent Nesting: Birds often nest in the gap between panels and the roof, creating fire hazards and maintenance headaches.

Avoid Bird Droppings: Bird waste can block sunlight, reduce efficiency, and corrode the panel surface.

Protect Wires from Chewing: Animals like squirrels can chew through wires under the panels, causing shorts or system failure.

Reduce Maintenance: Keeps the area under the panels clean and pest-free, minimizing long-term service costs.


Bird mesh for solar panels


Materials and Structure

Material Features
Stainless Steel Wire Mesh (SS304) Excellent corrosion resistance and long lifespan, ideal for long-term outdoor use
Galvanized Steel Wire Mesh

Lower cost but less resistant to rust

PVC-Coated Steel Mesh

Good aesthetics and weather resistance, suitable for residential rooftops

Plastic Mesh (PE/PP)

Lightweight and low-cost, ideal for temporary or budget-conscious projects


Mesh Size: Typically 12.5mm × 25mm (1/2" × 1"), small enough to block pigeons, sparrows, and other birds.

Mounting Method:

Uses bird mesh clips to attach the mesh to the solar panel frame without drilling;

May also use stainless steel ties or mounting rail fasteners;

After installation, the mesh is tight, secure, and does not compromise the system’s appearance.


PVC-Coated Steel Mesh for solar


Installation Guide

Measure and cut mesh to fit around all sides of the solar array;

Secure the mesh using dedicated bird mesh clips between the panel frame and roof;

Connect mesh sections with ties or wire to ensure a seamless perimeter;

Keep the mesh under tension for a neat and secure fit.


Key Advantages

Effectively prevents bird nesting and droppings
Tool-free installation with no drilling required
Protects the system without damaging solar components
Neat and tidy appearance with long-term protection
Suitable for both flat and pitched rooftop systems


solar panel wire mesh


Ideal Applications

Residential and commercial rooftop solar installations

Areas near trees, bird habitats, or food sources

Rural or suburban locations with high bird activity

Premium solar installations where clean aesthetics and durability are important

Conclusion

Bird mesh may be a small investment, but it delivers significant returns by protecting your solar system from damage and reducing maintenance efforts. It’s an essential accessory for any rooftop solar array in bird-prone areas.